Weld Quality Testing – DT & NDT Methods Explained
Updated: 18 Dec 2023
137
Welding is a critical aspect of any fabrication, so we need to ensure the integrity of welded joints by proper weld quality testing. In the below article, you will find out every little aspect of welding testing.
Welding testing involves sophisticated techniques, from radiographic testing to ultrasonic examinations. There are other different methods by which you have to identify imperfections in your welding structure.
Testing your weld with a proper welding method is essential. It will assure its welding integrity by giving you the industry standards.
After talking to many welders, we have made a detailed guide on Welding inspection. So, let’s get to it without wasting any time.
Weld Quality Testing: Let’s Dive Inside:
As you probably know, Welding is critical in various industries, so you should know its different testing methods. A proper welding structure is necessary for your overall process, but it only happens through satisfactory welding testing.
There are different welding defects which can affect your welding process. These welding defects need to be curved and fixed. The welding quality test will help you improve all of these problems.
Below, we have a couple of different types of welding tests, so let’s get to it.
Non-Destructive Welding Testing:
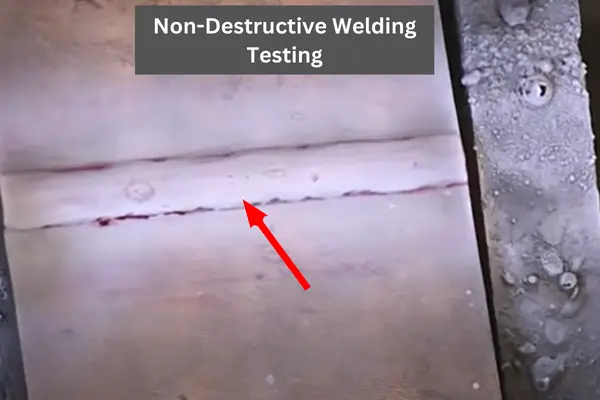
A non-destructive welding test (NDT) is a method that focuses on evaluating the integrity of Welding without damaging the base or tested materials. These methods are crucial for inspecting any welding when you want to preserve the state of the material. It introduces a couple of different safe methods for your base metal. Some of them are defined below.
Visual Inspection:
The visual inspection of the weld is the best and easiest welding testing that doesn’t damage your materials; you only have to examine the Welding’s appearance for visitable defects. You can also use glasses and mirror-like magnifiers.
Your primary focus should be to look for surface irregularities and welding discontinuities. You should also check the overall welding quality.
Radiographic Testing:
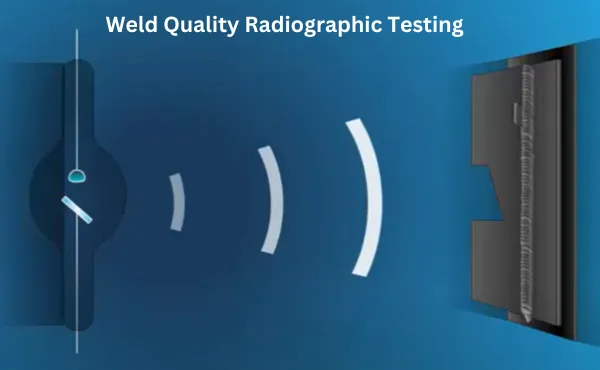
Radiographic testing (RT) is an expensive welding defect testing in which you will check for internal defects in the Welding. For this testing, you should use a machine that uses x-rays or gamma rays and passes those rays through that weld. Those rays create an image on a digital detector or film.
That film will show the defect of the weld if it has any. The result reveals all internal discontinuities like cracks, incomplete fusion, and porosity. Check for the radiographic weld testing representation below.
Ultrasonic Testing
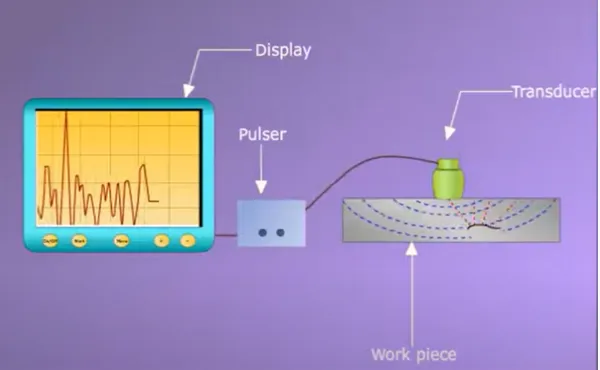
This Ultrasonic Testing (UT) is the same as the previous testing, but in this process, the internal and surface weld defects using high-frequency sound waves. The process is simple: pass a beam of high-power frequency waves directed to the Welding, and some of the waves reflect back, which are received and analyzed on a transducer.
The result is simple, but you need proper knowledge to understand it. This method lets you identify internal welding defects by getting a detailed guide to welding defect thickness, shape, and size. Check the below video for the ultrasonic welding testing process.
Magnetic Particle Testing (MPT)
The purpose of a magnetic welding test is to detect the weld defect on its surface and near the surface. To find the discontinues in the welds, a magnetic field is applied in the welding area by using magnetic probes to its surface, and a magnetic field is induced.
If the magnetic particles accumulate, welding defects like cracks or any discontinuities in the weld will be revealed. But if no particles are accumulated, your weld will be good, and there will be no defects.
The Magnetic welding test is limited when it comes to usage, which means that you can’t use it all the time. It is used with certain types of materials in certain conditions.
Liquid Penetrant Testing (PT)
Liquid penetrant testing is another method for testing welding defects. This method detects surface defects, including all the small cracks you may miss with other testing methods. The process is simple: apply a liquid penetrant to the surface of the weld, which is in a very bright color and glows fluorescently. The excessive amount of that liquid is removed, and the rest dry.
After that, a developer comes out and draws out the penetrants from the defects. However, this is an easy process in which you can find all the weld surface defects without affecting and damaging the weld itself.
This process has advantages and limitations that sometimes affect the choice of project and the materials you are using.
Destructive Welding Testing:
The destructive welding test involves evaluating the mechanical properties of your weld by subjecting your weld to a physical and mechanical force. This testing process can also destroy your tested material, but it will provide a very detailed insight into the weld, flexibility, strength, and other characteristics.
The destructive welding inspection is only needed when checking the sampling inspection, certification training, and welding analysis. Before testing these methods, you should check it on the same thickness material so you won’t damage your structure.
Tension Welding:
The tension welding test measures the maximum load a material can bear and withstand. In this testing process, a tensile force is applied to the welded specimen to a particular instant, or it fractures. As a result, you will get the ultimate tensile strength and the material’s elongation.
This method is chosen to determine the per-unit tension over the welded area. This testing method is suitable for determining the tension support limit and tells you its minimum requirements.
Bend Test:
The bend test is used to evaluate and calculate the ductility and soundness of your weld. A specialist usually does this process, but you can do it yourself. In the process, the welded specimen is bent into certain angles until it breaks or fractures.
Bending test has many types and shapes but is mainly used for the beginning qualifications. The test is good if it reaches its required bending limit, but it is considered failed or rejected if it has cracks or discontinuity before that.
The result of this test is to identify the welding defects like cracks and find their ability to withstand bending.
Impact Test:
It has many names, but the impact is considerably good because of its relevance to its test. In this test, as mentioned in the name, we want to find out the ability to absorb energy, and we can do that by checking its energy under impact.
The process is simple: we take a big weighted pendulum, strike the material with it, and then measure its ability to absorb the impact. In this process, we can indicate and find out the toughness and resistance of the material to the brittle and fractures.
Macro Etch Testing:
This welding testing is slightly different from the rest of the testing process. In this process, some test specimens are cut or removed from the welding joint with the help of a grinder, or you can use the cutting wheel.
Then, the cross-section parts of this weld are cleaned and positioned for the next step. In the next step, these weld parts are etched into a saturated acid mixture to inspect any discontinuity in the weld properly. You can see any fracture or discontinuity visually.
Common Weld Defects:
Just like in everything else, people make mistakes in Welding, sometimes caused by the welder, while other times the reason is faulty equipment or environmental contamination. That mistake sometimes can also be seen by the naked eye.
Before trying to fix these issues, you should know why they are happening. After understanding, you not only prevent it from happening in the first place but also fix it with proper welding testing.
Below, we have an in-depth explanation of possible weld defects.
Porosity:
Porosity is a welding defect when the normal gas is trapped in the welding metal. It makes the whole Welding bad and bumpy. It happened for a couple of different reasons. First, it is because of the usage of inadequate shielding gas, but it could also occur due to contaminated base metal. The last reason is improper welding technique.
Detecting this welding defect is easy, and you can identify it by its look, but you can also do X-ray testing instead of visual weld inspections. After detection, you can correct or prevent it from being used in the first place by using proper shielding gas, cleaning base metal, and adjusting welding parameters.
Incomplete Penetration:
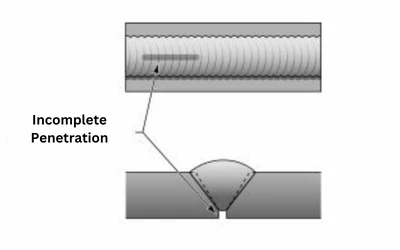
Incomplete penetration is clear from its name: a weld that does not fully penetrate the joint. It’s also one of the common welding defects, which is why you need welding quality testing. These welding defects are caused by insufficient heat and incorrect welding techniques and experience.
Just like porosity, you can also detect it by visual inspection. Still, for proper checking, you will need ultrasonic testing or any other weld penetration test to verify it is an incomplete penetration defect. After that, you can fix it by adjusting your welding parameters and ensuring proper welding joints.
Incomplete Fusion:
Incomplete fusion happens in the Welding due to a lack of fusion between base and welding metal. The reason for this welding defect is also the same as incomplete penetration, which is an improper technique and low heat input.
You can identify by its look through visual inspections for detection and testing, but for proper testing, you should use x-ray testing. After inspecting it, you can fix it by adjusting your welding parameters.
Cracks:
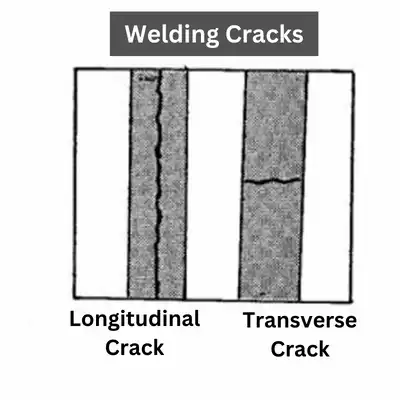
This welding defect is also the same as its name: fractures in the welded metal after Welding. It is one of the common welding defects caused by rapid heating after Welding and high residual stress.
The detection is simple, and you can see by your eye, but you can also use a magnetic particle test to confirm it. Preventing or correcting this welding defect is easy, and you can fix it by controlling its heating when cooling down and preheating it before starting Welding.
Undercut:

The burning away of base metal and making a groove along the welding edge is called undercut. It is caused by excessive heat and too long arcs with incorrect welding techniques. You can easily detect it by visual inspection.
The prevention and correction are simple: control the input heat along with proper welding techniques.
Well, it’s not a welding defect but more of an environmental effect on the Welding. Corrosion happens to welds, metals, and nonmetals, which deteriorate that material due to oxidation. The cause is oxidation, which occurs when the weld is exposed to the environment.
It can be visually inspected because you can see when it degrades. You can fix it by preventing it from water and other environmental elements. Painting is also an easy fix.
Welding Burn Through

Welding Burn Through is also a common welding defect that happens when the base metal melts down from the hot temperature of the welding gun. If the base metal is thin, it also creates a hole by ruining the whole process.
It is caused by excessive input heat and improper or lack of experience welding. The inspection is easy because you can see through your eyes. The fixing is easy. Follow, keep track of your input heat, and avoid welding mistakes.
FAQs:
How do you test Welding quality?
You can test welding quality by visual inspection at first. It would help if you looked for bends, beads, cracks, craters, other flaws, and visual concerns. You can also use different testing equipment for its different testing methods.
What are the Testing Methods in Welding?
There are different testing methods in Welding, which are destructive and non-destructive welding inspection. The destructive testing method can affect and destroy your weld, while the non-destructive welding inspection doesn’t. So, you should carefully choose the welding test.
What is the MPI test in Welding?
The MPI means magnetic particle inspection, also known as magnetic particle testing, which is non-destructive welding testing. It’s used for the surface of ferromagnetic materials. It’s safe to use because it’s a non-destructive testing method.
Which NDT test is Best?
There are three types of nondestructive testing, all of which have their own qualities, but ultrasonic testing is considered the best. It’s easy, cheap, and also safe to do it.
How many types of Welding tests are there?
There are totally two welding testing types. One is NDT, which refers to nondestructive testing welding, and the other is destructive testing. Both of them have their advantages and disadvantages.
What is a Welding inspection:
The welding inspection is the process to ensure your welds meet the required level of quality. It’s the same as checking quality in welding testing. In this process, you must inspect the Welding with different techniques and make it according to the required needs.
Final Thoughts:
Testing welding quality is essential, and most welders emphasize it to get better Welding. These welding tests will cover all of your critical welding defects, and then you can fix them as you go.
It’s essential to give you the best Welding and keep you informed so that you can adapt to the basic welding practices to achieve excellence.
Please Write Your Comments