Projection Weld Symbols – Elevate Your Welding IQ
Updated: 27 Jan 2024
93
The key to understanding projection welding is its symbol because it’s considered effective in communication while manufacturing. These symbols will help you know vital information about welding in most engineering drawings.
The projection welding symbol is very important for most welding documentation as it provides a detailed visual representation for any welder. These symbols help to communicate the whole process in its strength, location, and size according to practice welding standards.
Without a welding symbol, you can’t read or understand any welding drawing or diagram. The welding symbol in projection weld and other welding processes is considered a universal language. We have a detailed guide about projection symbols, so let’s get without any more wait.
What is Projection Welding:
Projection welding is different from other normal welding processes because it is based on resistance. In this welding process, you can join two or more elements by applying pressure in the presence of heat to a particular area where you want to join them. In the process, you have a predetermined spot for welding, which is why it’s called projection welding.
The process is one of the most efficient welding methods in the market and is mainly used for automotive and other welding industries.
Projection Weld Symbol:
To understand the welding process, you must know the essential welding symbols in most diagrammatic representations. It has different means and representations that must be understood for proper knowledge and understanding of the process.
Below, we define each symbol in detail, so you should know what you are getting into. So, let’s get into it.
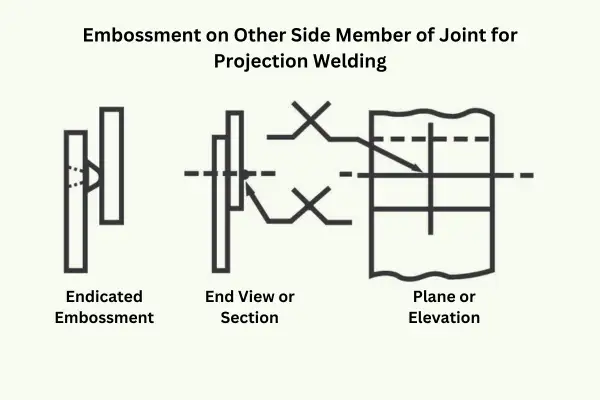
During the projection welding, we have an arrow symbol with a spot-welding symbol in its tail referring to its projection welding. If the raised part of the arrow pointing to the joint side means the projection welding, then it must be represented by reference lines.

But if there are embossments on the opposite side of joints for projection, the welding symbol will be upside down.
Projection Welding Size:
Most projection welding is dimensioned by strength, while all other circular projection welds are dimensioned by size.
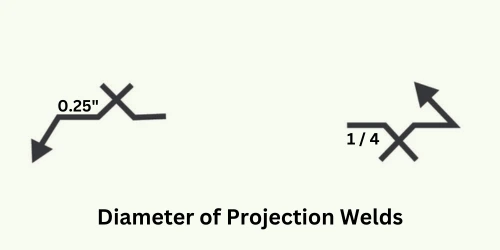
The starting point of any diameter of circular projection welds, whether decimal or fractional, should be on the left side of its symbol.
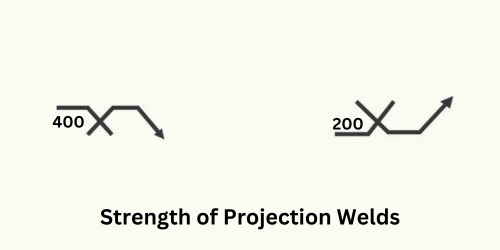
The state of the strength of any projection weld is represented in pounds per weld, and it is also represented on the left side.
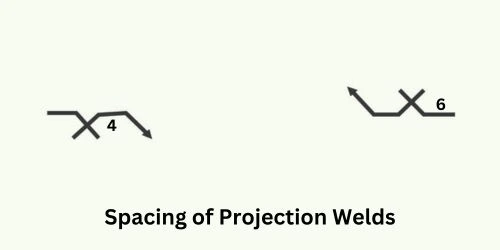
The pitch means the space of all the projection welds is also mentioned on the right side of its welding symbols.
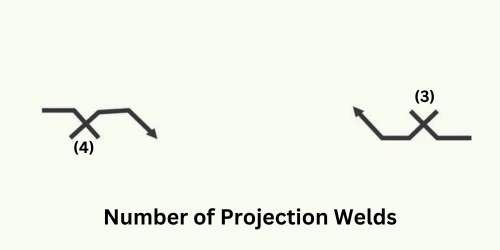
Whenever you see a number in parentheses, know it is the number of its joints. In projection welding, the number of joints is represented inside of parentheses.
Conclusion:
The symbol in projection welding is significant. It’s essential to learn because you need to know and understand it to understand the welding drawing and references. Most welding symbols are easy, while others want you to memorize them.
I hope you get what you are looking for, but for more info like that, you can visit our main website.
Please Write Your Comments